

1.0 Introduction
1.1. Welcome & Purpose
Welcome to your new Ultimate Calendar Template! This guide will walk you through everything you need to know to transform this powerful template into your personal life planner. Our goal is to help you move from feeling disorganized to being in complete control of your schedule.
1.2. What You Received: The Two Files
Inside your download, you will find two separate Excel files:
Analysistabs Ultimate Event Calendar - Sample Data.xlsxAnalysistabs Ultimate Event Calendar - Blank Template.xlsx
Pro Tip: Explore the Sample Data First!
Before you start, we strongly encourage you to open the "Sample Data" version. Click through the different sheets, use the filters, and see how events are displayed. This is the best way to understand the full power of the template before you begin adding your own information.
1.3. System Requirements
This template is designed for Microsoft Excel 2021 and higher, Excel for Microsoft 365, or newer versions that fully support Dynamic Array functions.
2.0 Getting Started: Your First 10 Minutes
Follow these three essential steps to personalize your planner. For this setup, please use the Ultimate Calendar - Blank Template.xlsx file.
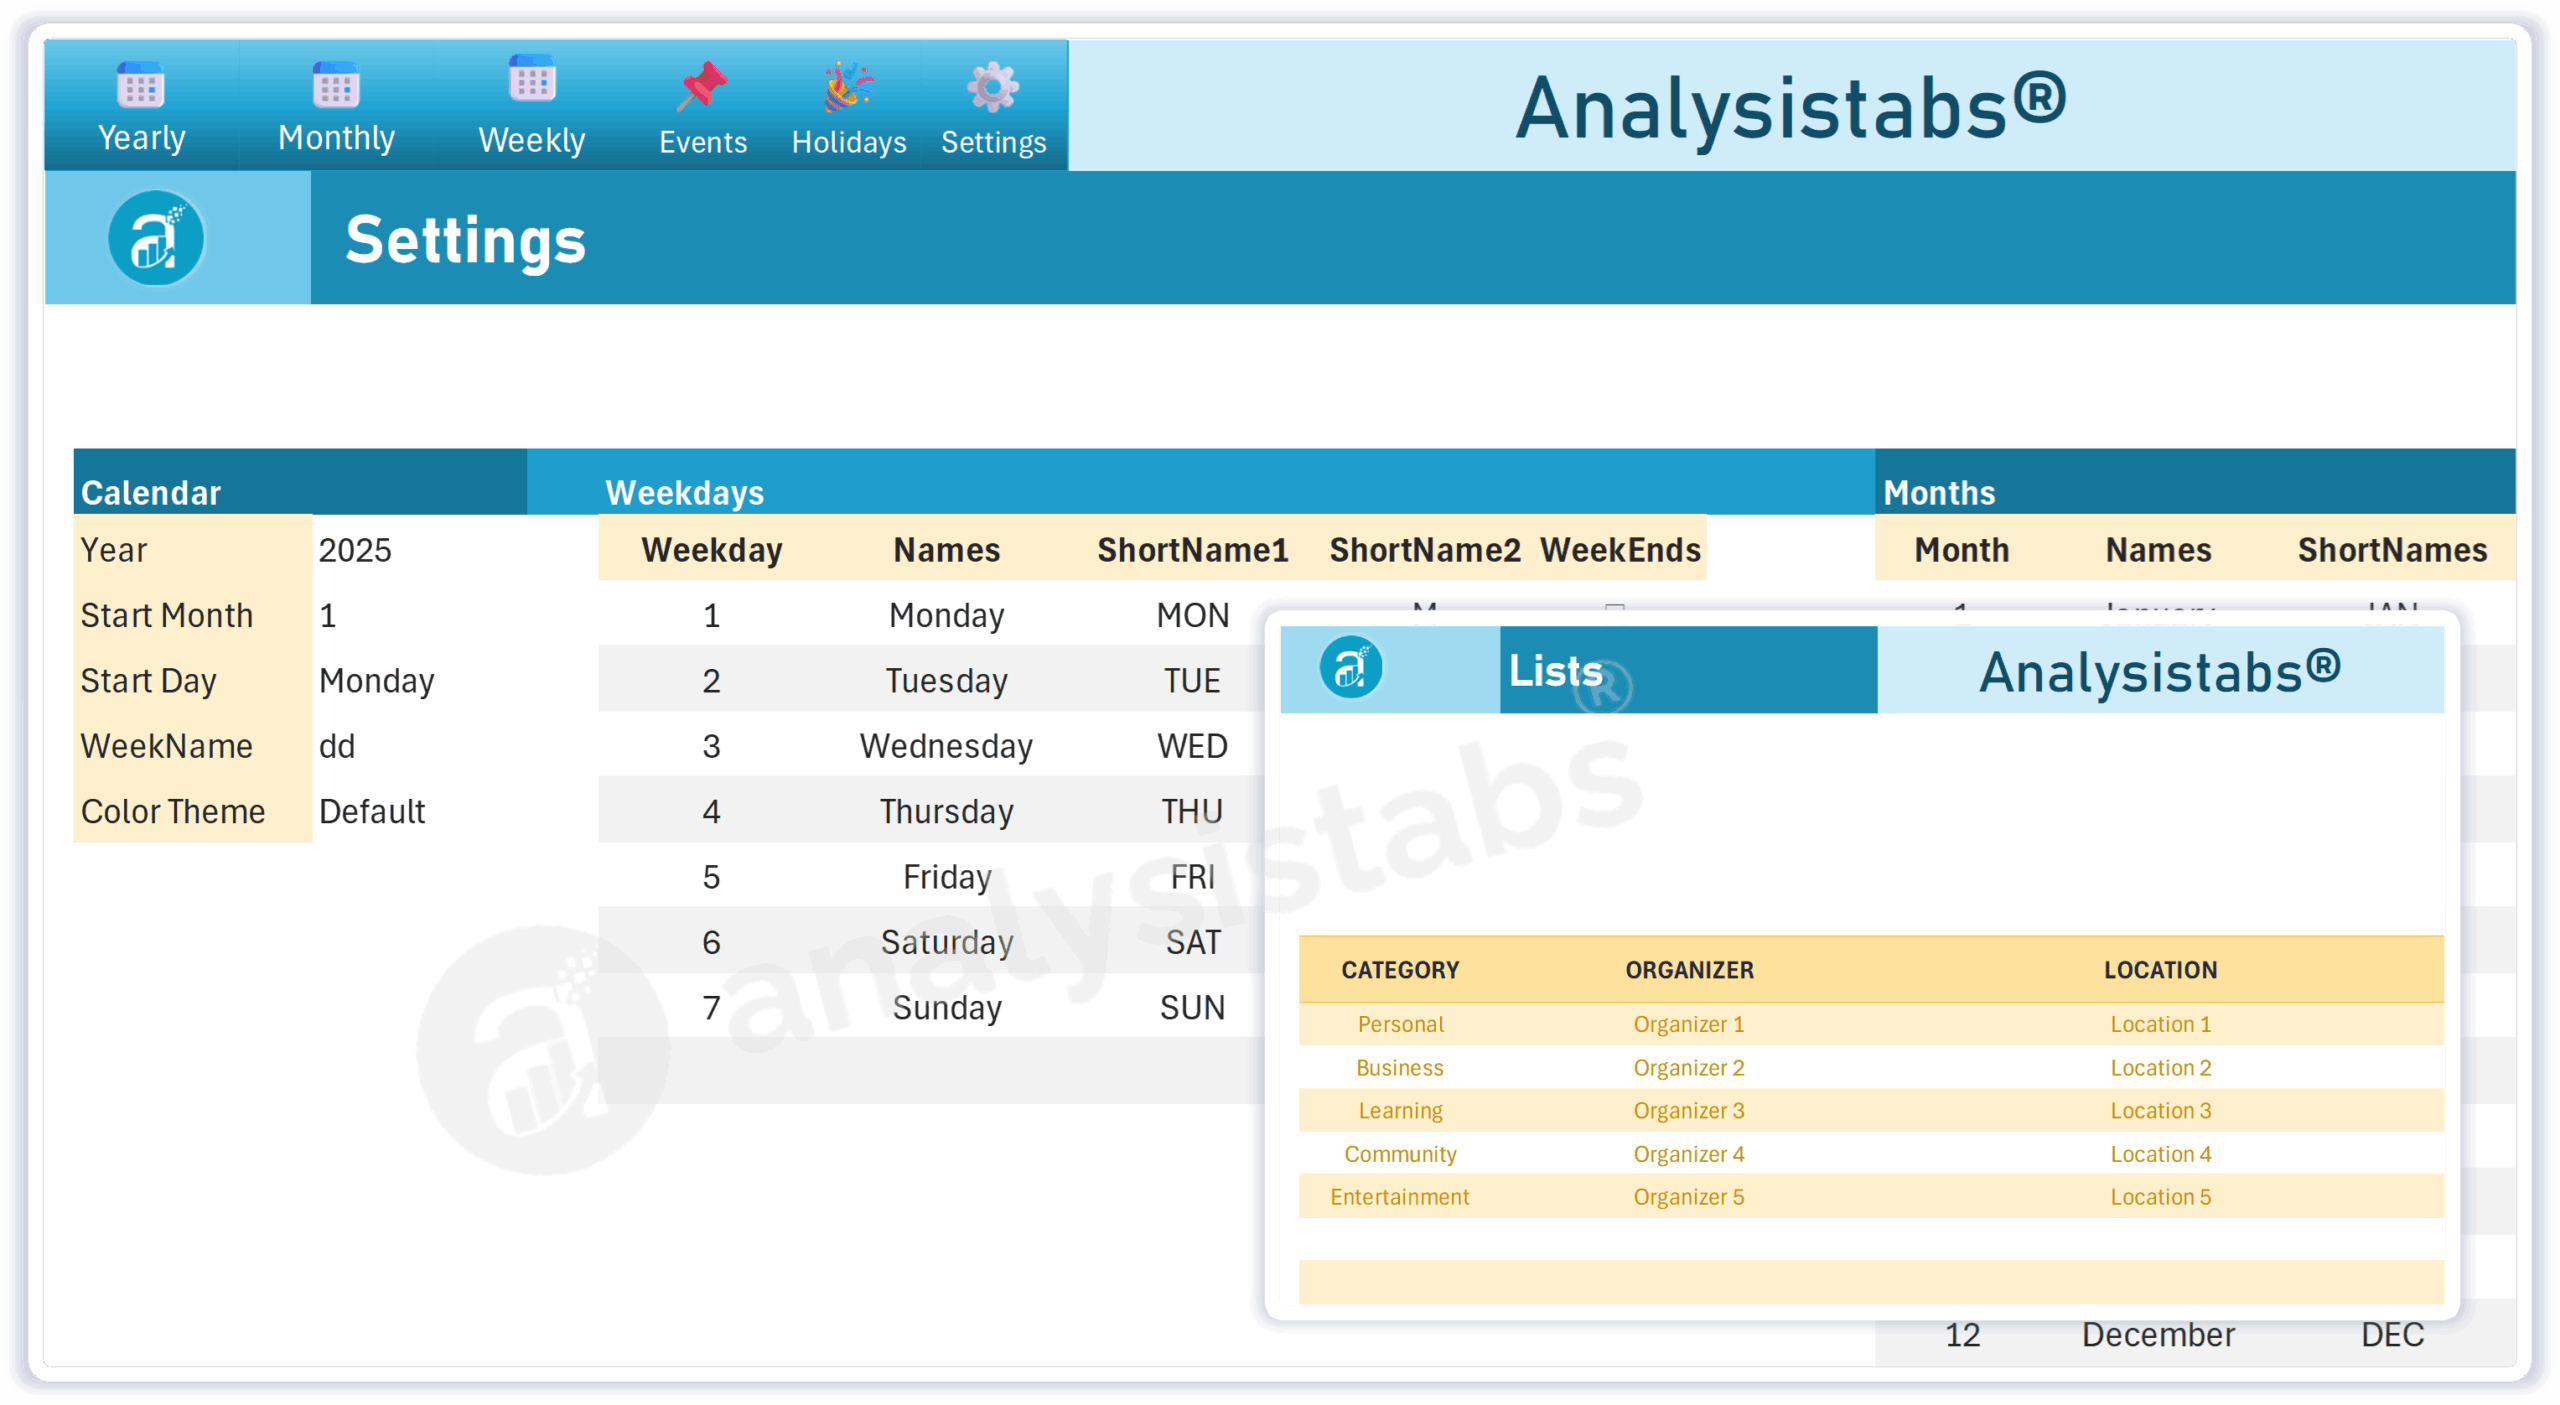
2.1. Step 1: Open the Settings Sheet
This sheet controls the global behavior of your calendar.
- Navigate to the
Settingssheet. - Set the current Year (e.g.,
2025). - Choose your preferred Start Day of the week (e.g., "Monday" or "Sunday"). All calendars will automatically adjust.
2.2. Step 2: Open the Lists Sheet
This is where you define the dropdown options to make data entry fast and consistent.
- Navigate to the
Listssheet. - Under the CATEGORY column, replace the samples with your own event types (e.g., "Work," "Family," "Health," "Project X").
- Do the same for the ORGANIZER and LOCATION columns.
2.3. Step 3: Add Your First Event
Let's see your setup in action!
![]()
- Navigate to the
Events Trackersheet. - In the first empty row, enter a Date, Event name, and select a Category from the dropdown menu you just created.
- Now, click on the
MonthlyorWeeklycalendar tabs. You will see your event has automatically appeared!
3.0 Detailed Guide to Each Sheet
3.1. Data Entry & Management
3.1.1. The Events Tracker
This is the central hub for all your appointments, tasks, and deadlines. Add an item here, and it populates everywhere else.
- How to Add an Event: Simply start typing in the first available blank row.
- Columns Explained:
DATE: The date of your event.EVENT: The name of your event or task.CATEGORY: Select a category from your custom list. This drives the color-coding.TIME/DURATION: Optional fields for specific scheduling.STATUS: Mark events as "Attended" or "Cancelled" for a clear visual record.
3.1.2. The Holidays Tracker
This sheet automatically adds holidays to your calendar. Customize it once for your region and forget about it.
- To add a holiday, simply type the Date and Description in a new row.
- To delete a holiday you don't observe, simply delete the row.
3.2. Using the Calendar Dashboards
3.2.1. The Yearly Calendar
Your high-level, strategic view.
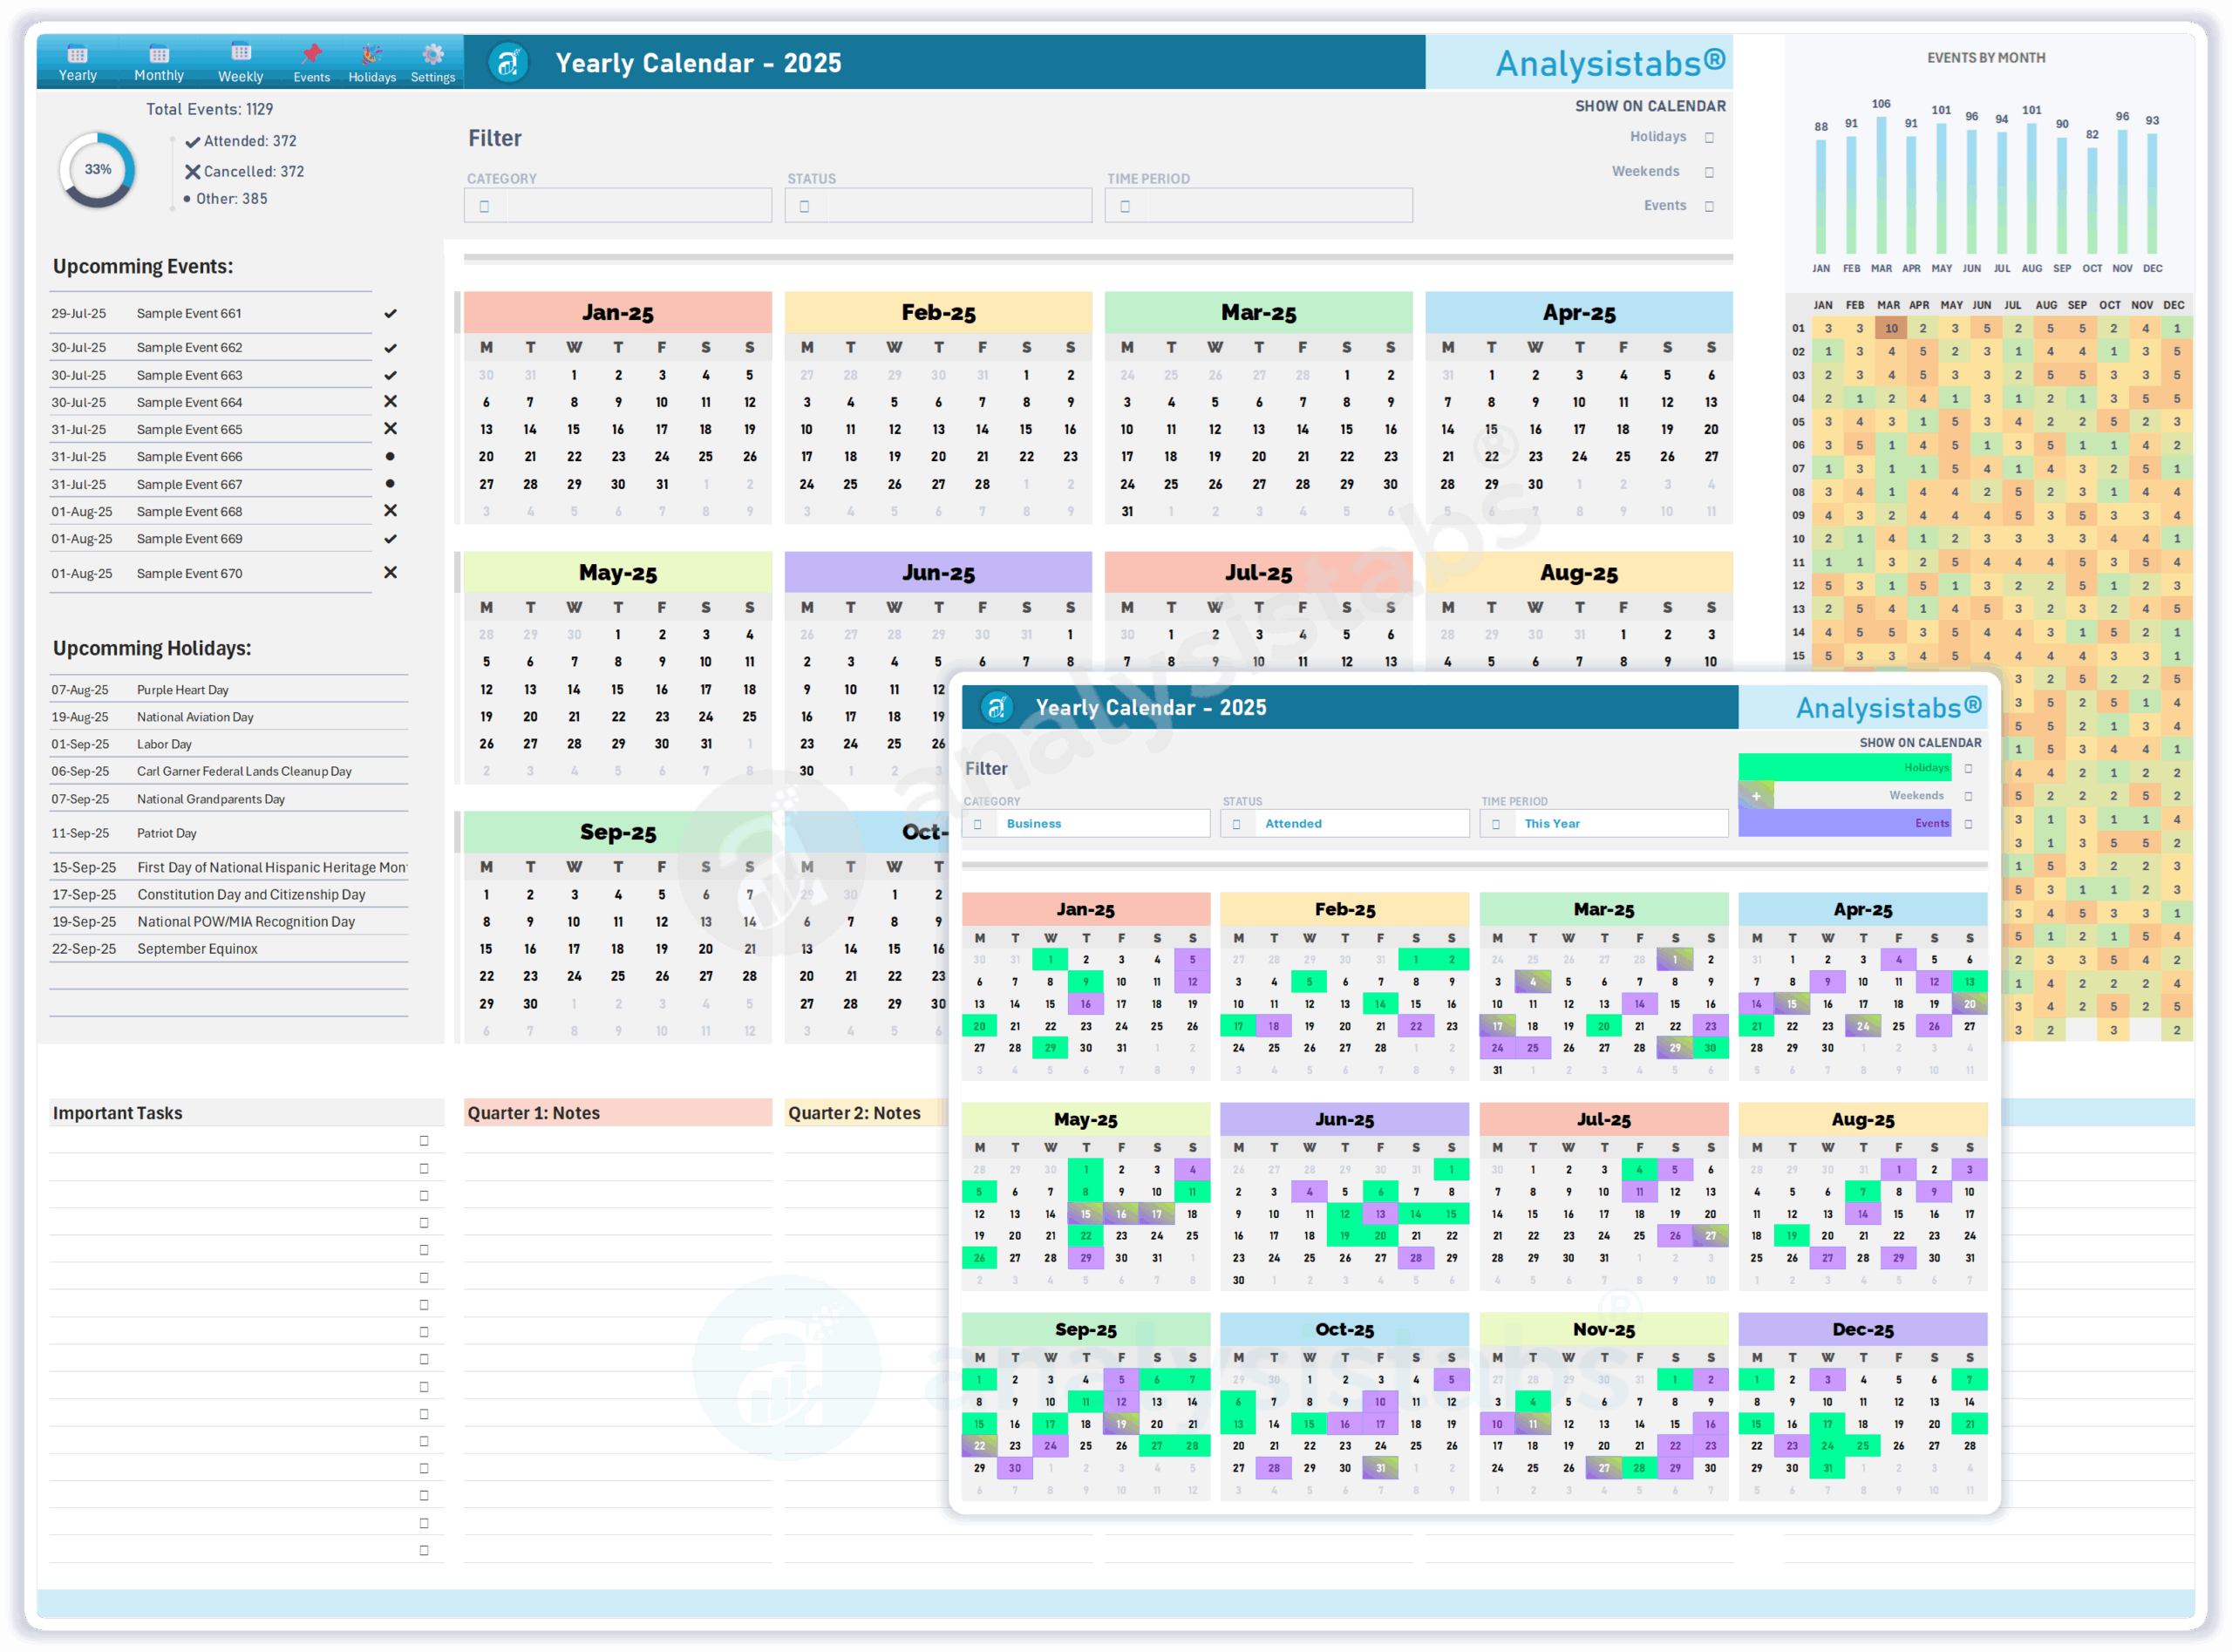
- Change Year: Use the year selector at the top to jump to any year.
- Event Heat Map: The grid on the right visualizes your busiest days. Darker colors mean more events.
- Filter by Category: Use the slicer on the left to focus only on specific event types.
3.2.2. The Monthly Calendar
Your command center for the month.
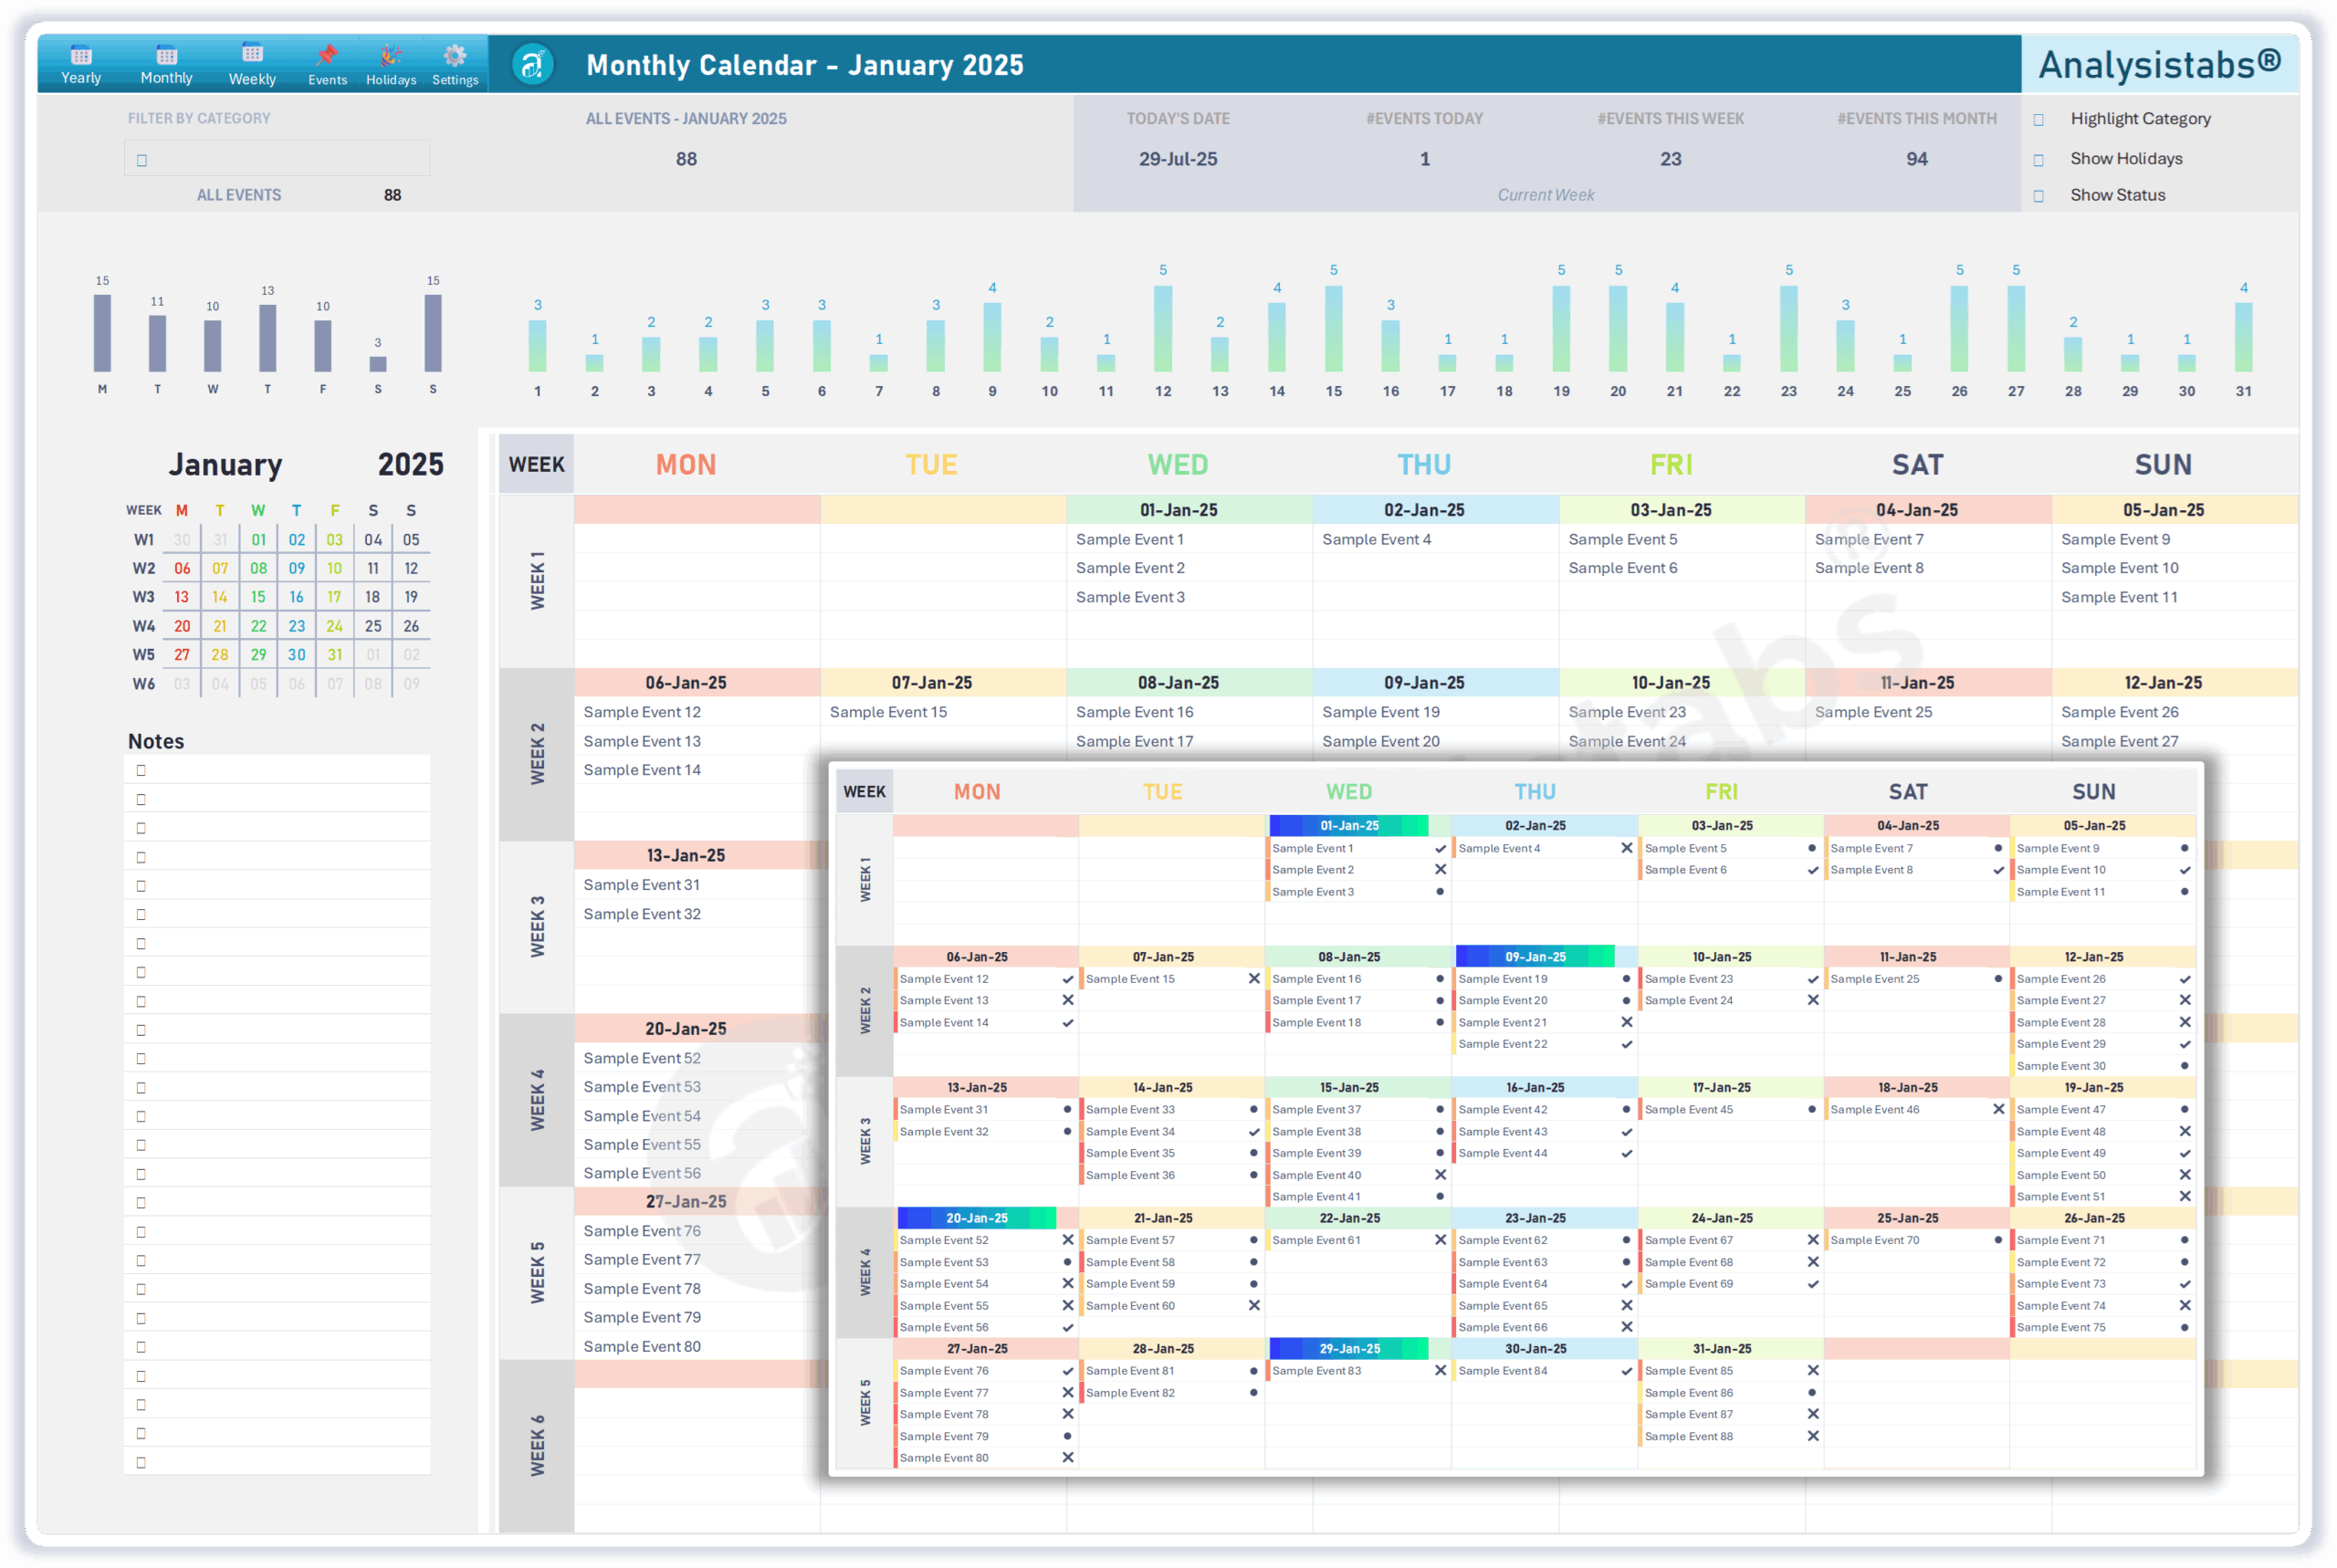
- Navigate Months: Select any Month and Year to view that Particular Monthly Calendar.
- Workload Chart: The bar chart at the top shows your event count per day, helping you avoid over-scheduling.
3.2.3. The Weekly Daily Calendar
Your tool for detailed, daily execution.
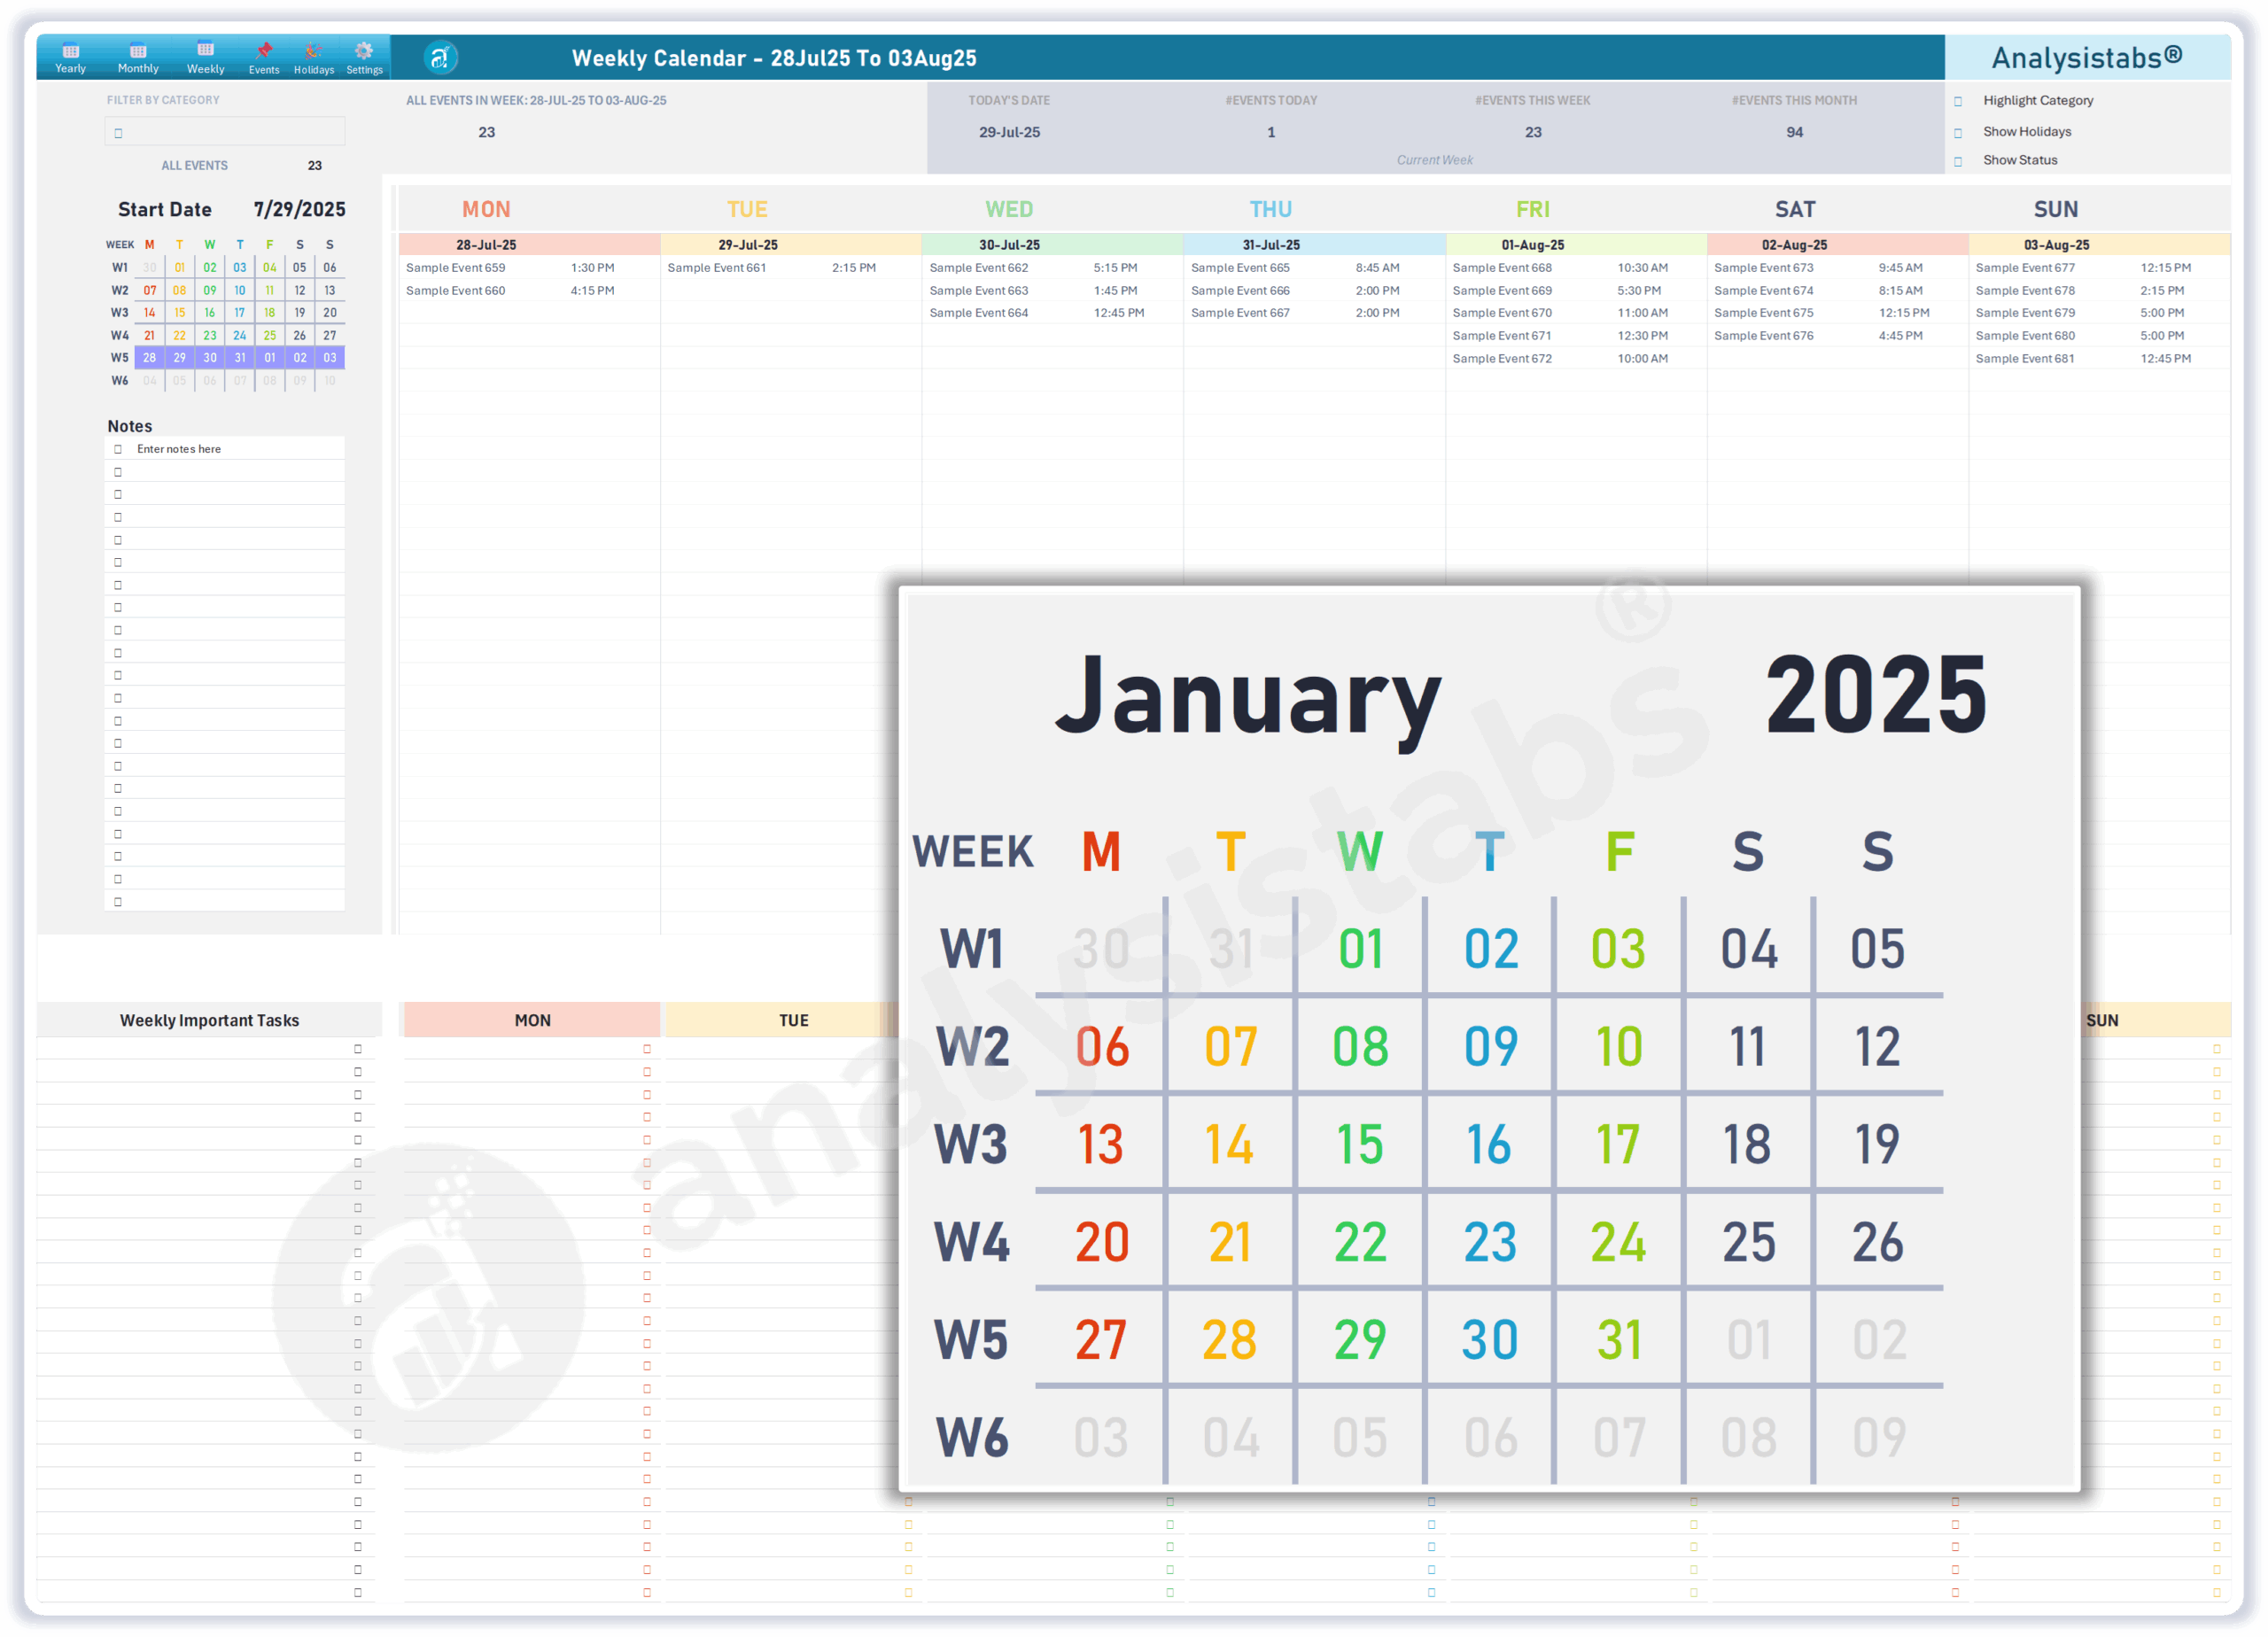
- It shows current week calendar by default using (=TODAY()). You can Jump to any week by enter the Start Date of of any week, the Weekly calendar will change automatically.
- Customize Your Weekly Calendar: Use the Options provided at top right corner to view Holidays, Status and Highlight Categories
- Task Checklist: Use the bottom section to list weekly tasks and tick the checkboxes as you complete them each day.
4.0 Advanced Customization (Optional)
4.1. Translating the Template
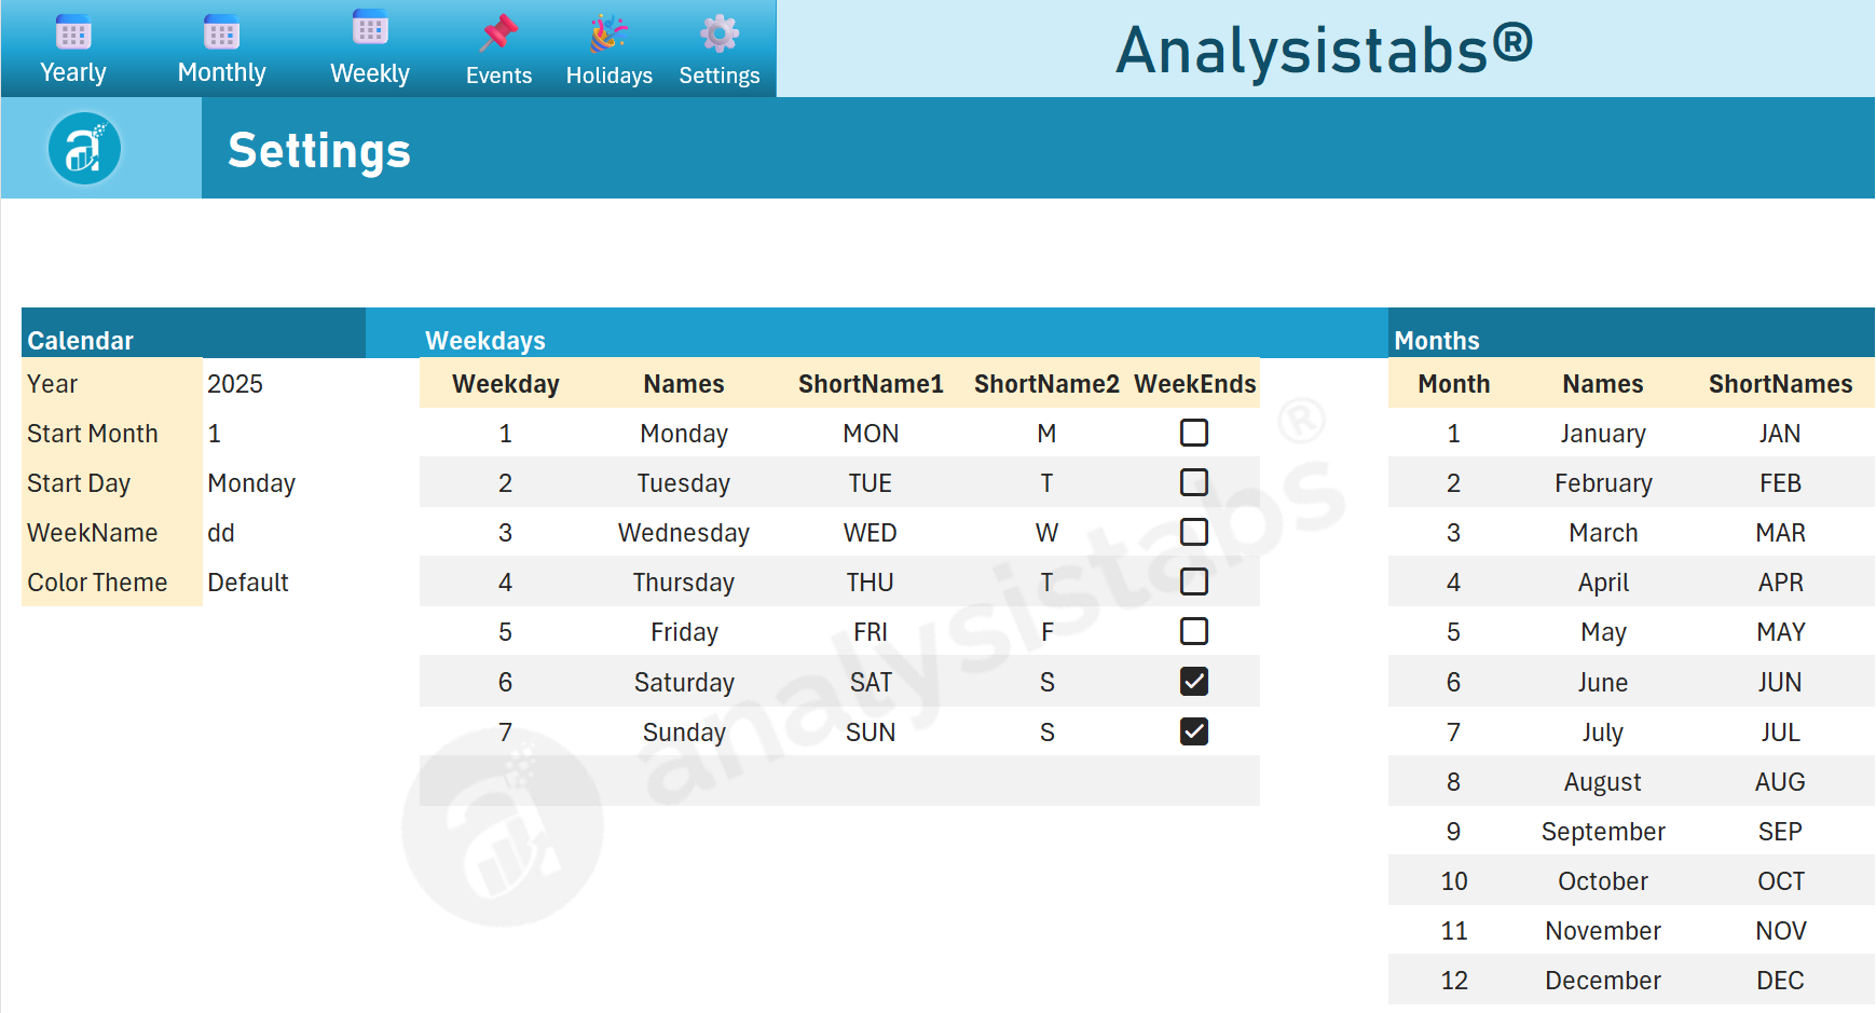
You can easily translate the template into another language:
- Go to the
Settingssheet. - In the "Weekdays" and "Months" tables, simply type over the English names with your desired language.
- The entire template will instantly update.
For Power Users: Understanding the Calculations Sheet
Disclaimer: You do not need to touch this sheet for the template to work perfectly. This section is for advanced users who want to understand the template's mechanics.
The Calculations sheet is the "engine" of the planner. It performs all the background logic that filters your data and feeds the visual dashboards. Because this template is not protected with password, you can unlock (From Review Tab of the Ribbon Menu), you are free to view these formulas to learn from them or even modify them if you have a unique need. We recommend making a backup before changing any core formulas.
5.0 Frequently Asked Questions (FAQ)
Q: How do I clear all the sample data to start fresh?
A: Simple! Just use the second file included in your download: Ultimate Calendar - Blank Template.xlsx. It's already empty and ready for your data.
Q: How do I add a new item to a dropdown menu (e.g., a new Category)?
A: Navigate to the Lists sheet and add your new item at the bottom of the relevant column. The dropdown menus in the Events Tracker will update automatically.
Q: I think I broke a formula. What should I do?
A: The easiest way to fix this is to open the original file/ backup files you saved. We recommend always keeping a clean, untouched copy of the blank template as a backup.
6.0 Contact & Support
Thank you for choosing the Ultimate Calendar Template! We hope it brings clarity and control to your planning.
If you have any questions not covered in this guide, please feel free to reach out to us at our support page.